Channels in Orta include a range of settings and management options tailored to each user’s role. While Channel Owners and Managers can update channel details, manage member access, and perform administrative actions, Members can view channel information and leave the channel when needed.
Access channel settings:
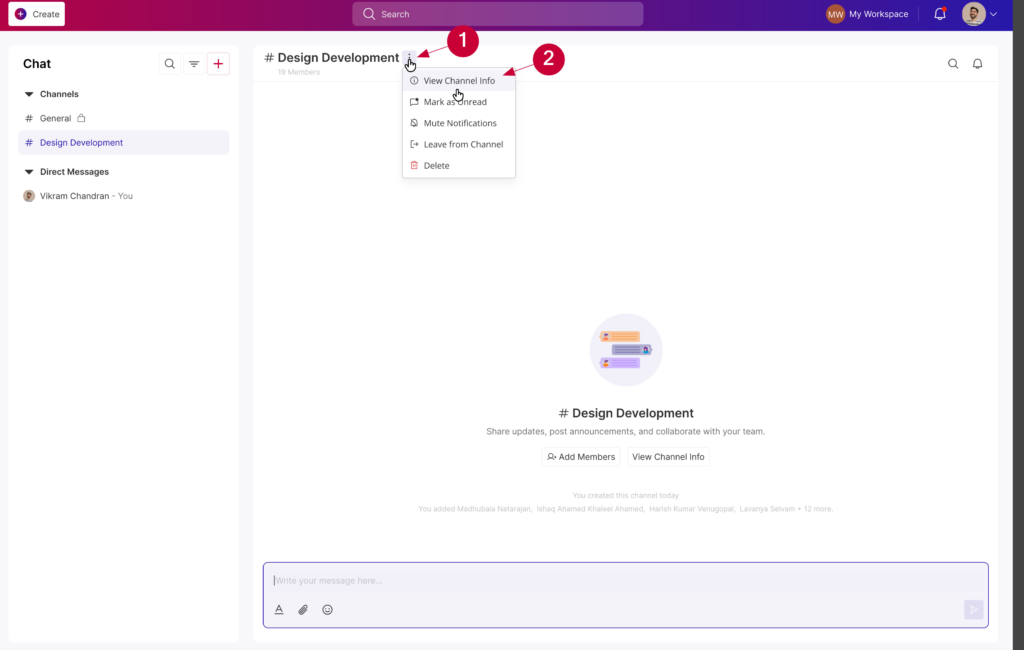
To begin managing a channel:
- Click on the More actions (⋮) button near a channel’s header
- Select View Channel info from the dropdown.

This opens a form containing all administrative actions, from viewing basic info to permanent deletion.
Refine channel identity:
As a channel owner or manager you can keep your team aligned by ensuring the channel name and description accurately reflect the current work.
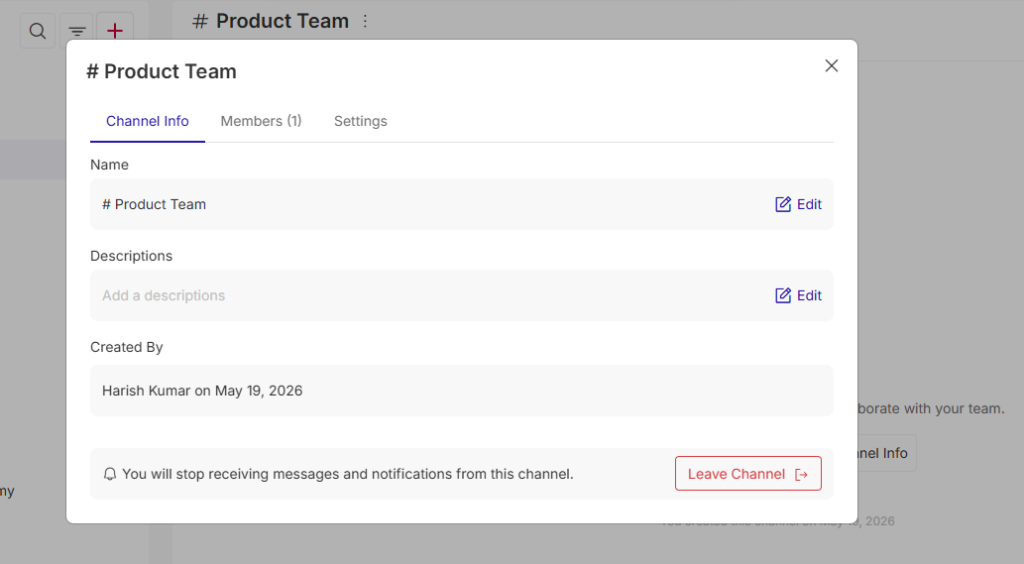
- After selecting View Channel Info menu, a pop up opens.
- In the Channel Info tab, you will see the current Name and Description fields.
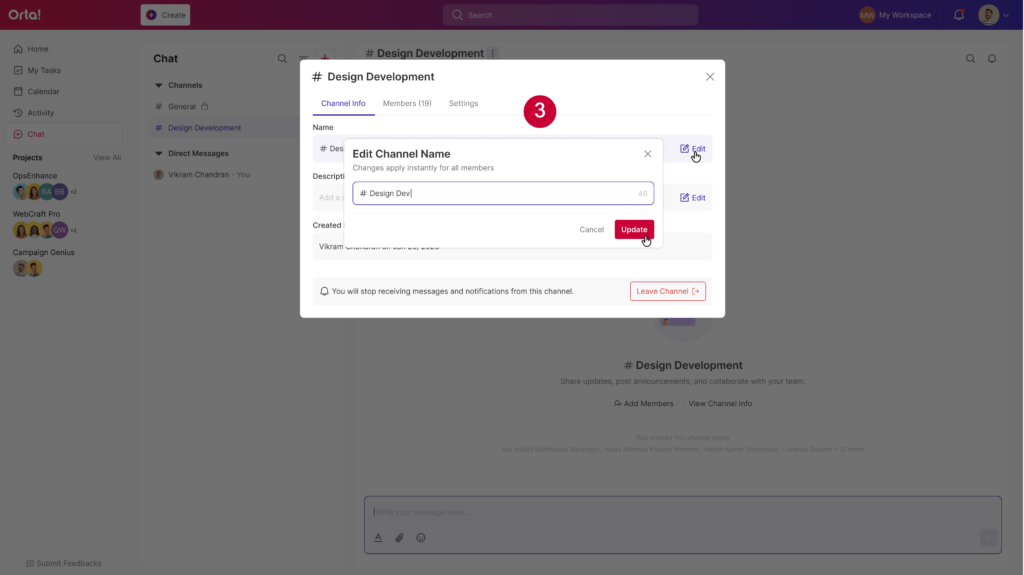
- Update Name: Click the Edit icon next to the name. Enter the new title in the pop-up and click Update.
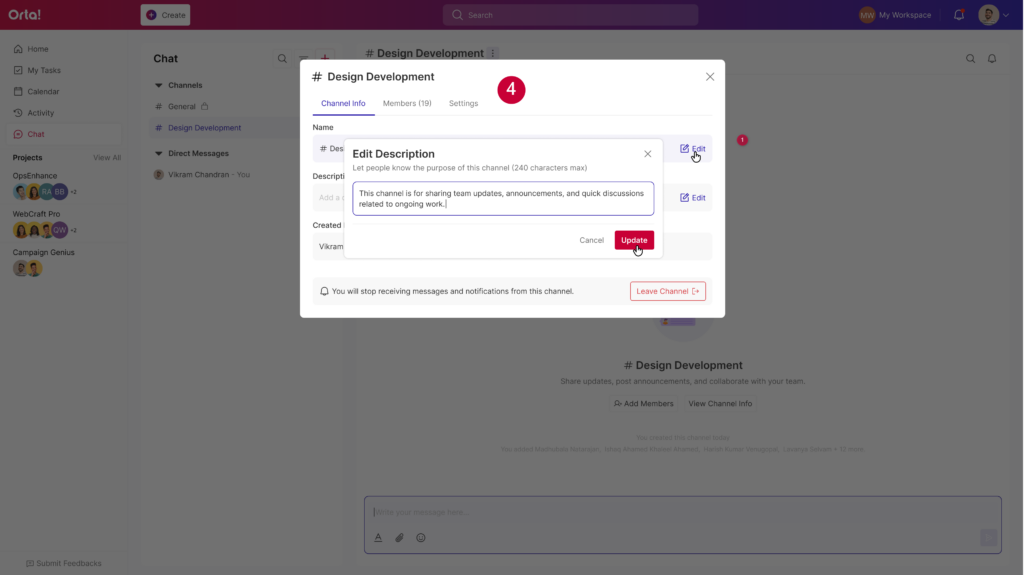
- Update Description: Click Edit next to the description. Briefly explain the channel’s purpose (up to 240 characters) and click Update.
Manage membership and roles:
Ensuring the right people are in the room is key to effective collaboration. Navigate to the Members tab within the Channel Info tab to manage your team:
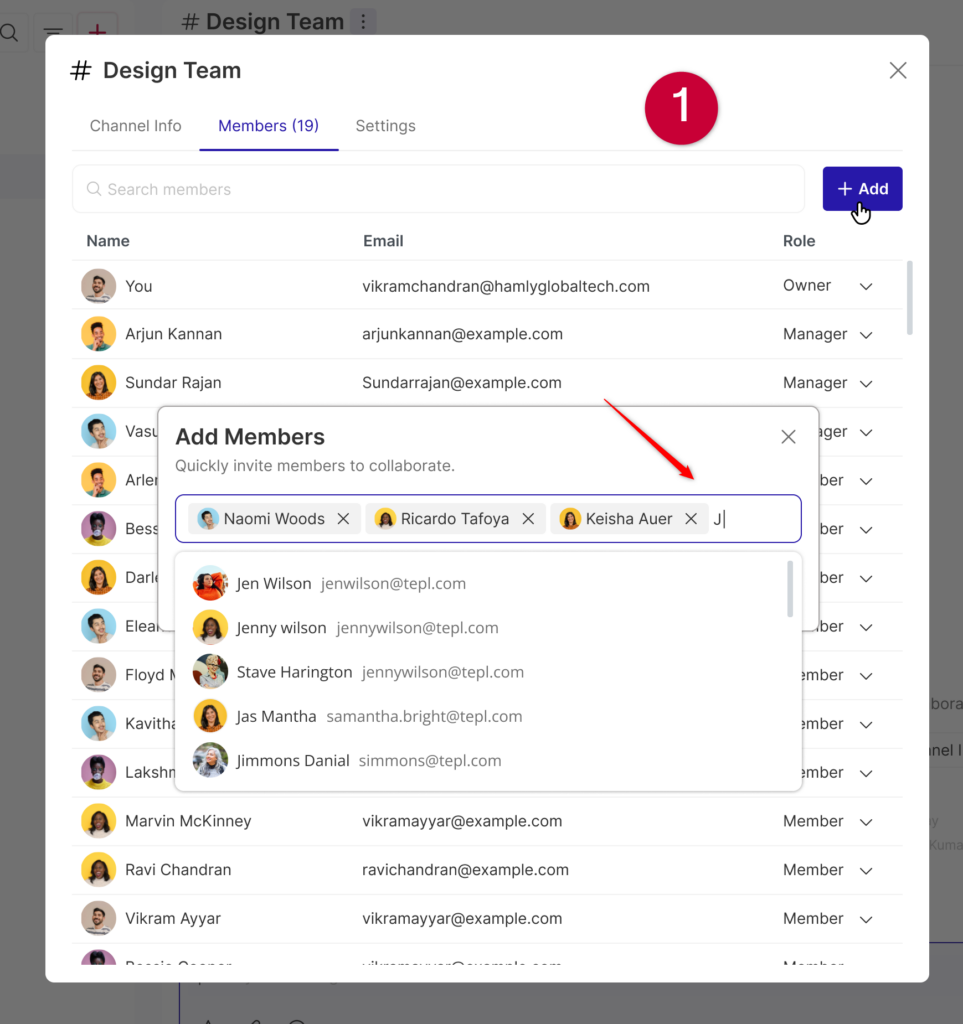
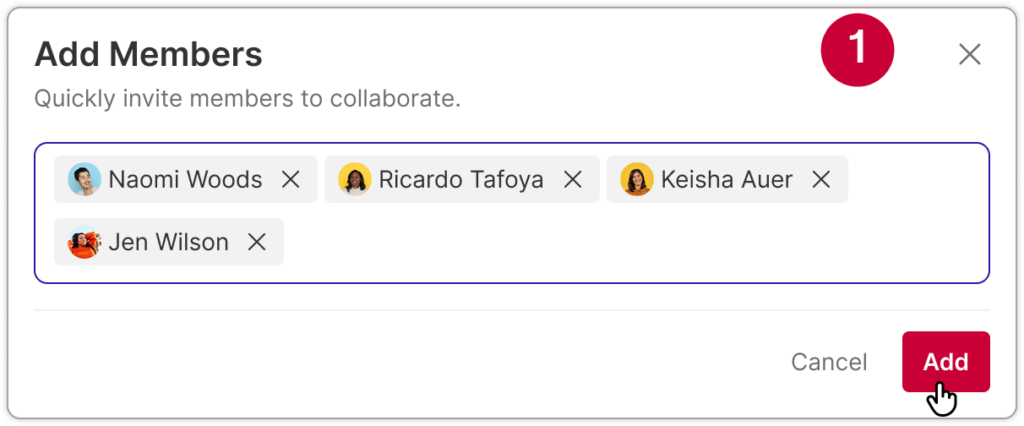
- Add New Members (All Members): Click the + Add button. Search for teammates by name or email, then click Add to invite them instantly.
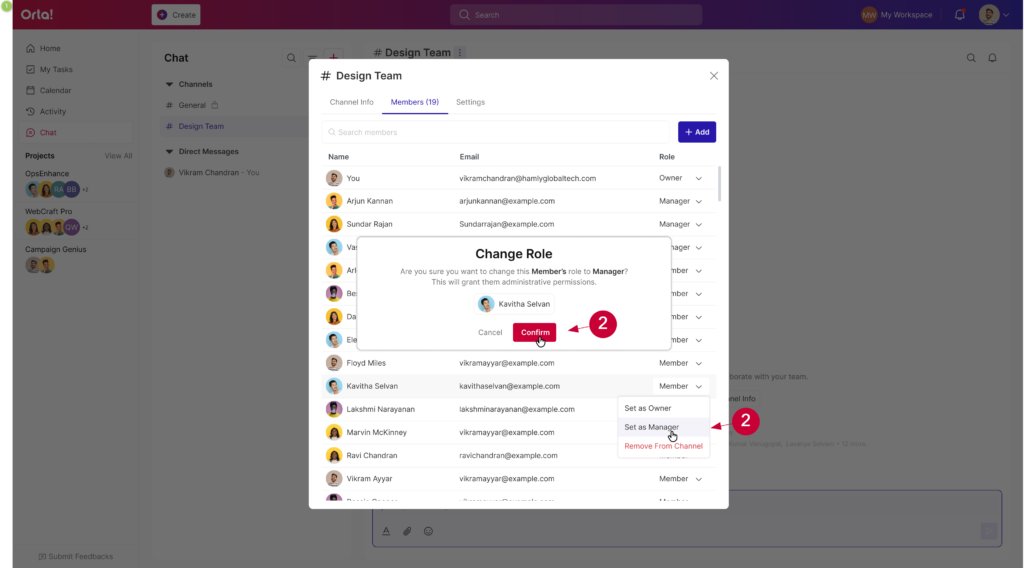
- Assign Roles (Owner): Click the dropdown arrow next to a member’s current role. You can promote a colleague by selecting Set as Owner or Set as Manager.
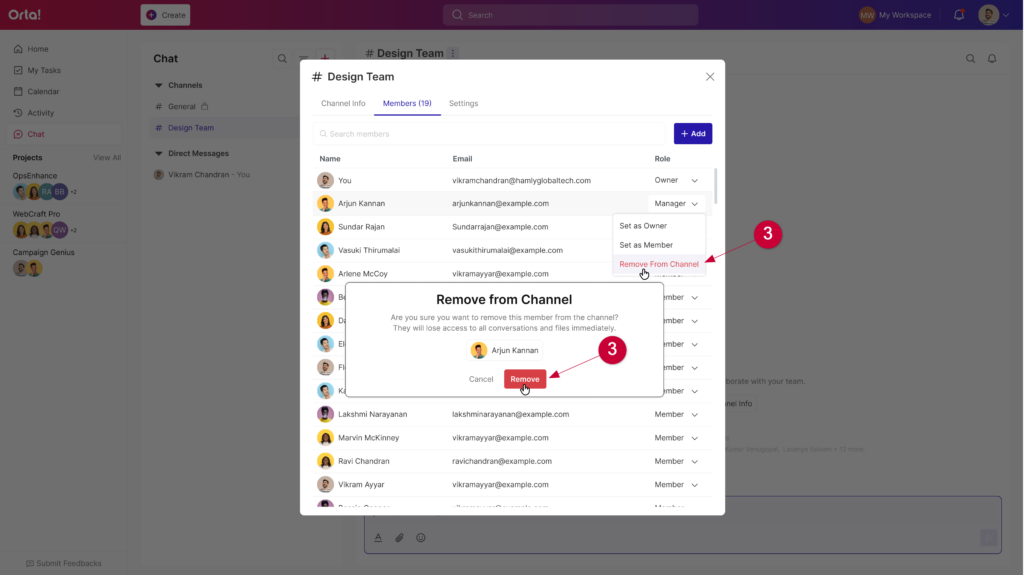
- Remove Members (Owner and Managers): If a teammate no longer needs access, select Remove from Channel from the role dropdown menu.
Leave or Delete a Channel:
When a channel reaches its conclusion or your role in a chat ends, you can either depart the group or remove the channel entirely.
Leave from channel:
Leaving a channel removes it from your sidebar while keeping the conversation active for remaining members. The process differs depending on your role:
Scenario A: Leaving as a Member/Manager
- Click the dropdown next to your name in the member list.
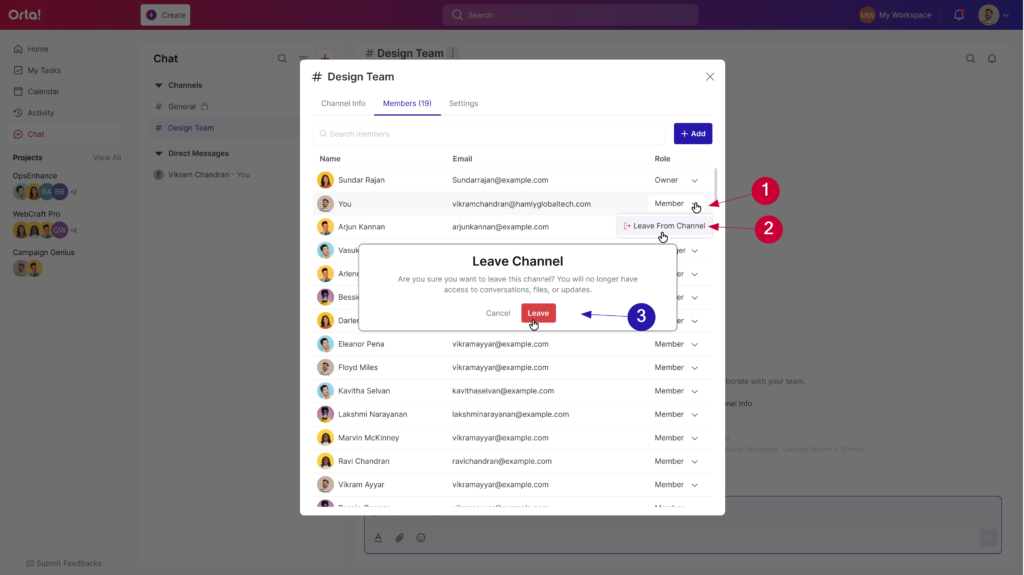
- Select Leave from Channel.
- On the Leave Channel pop-up, click Leave to confirm your exit.
Scenario B: Leaving as an Owner
To ensure the channel remains manageable for the team, owners must pass the torch before leaving.
- Click the dropdown next to your name in the member list and Select Leave from Channel.
- In the “Leave Channel” pop-up, click into the Search members field.
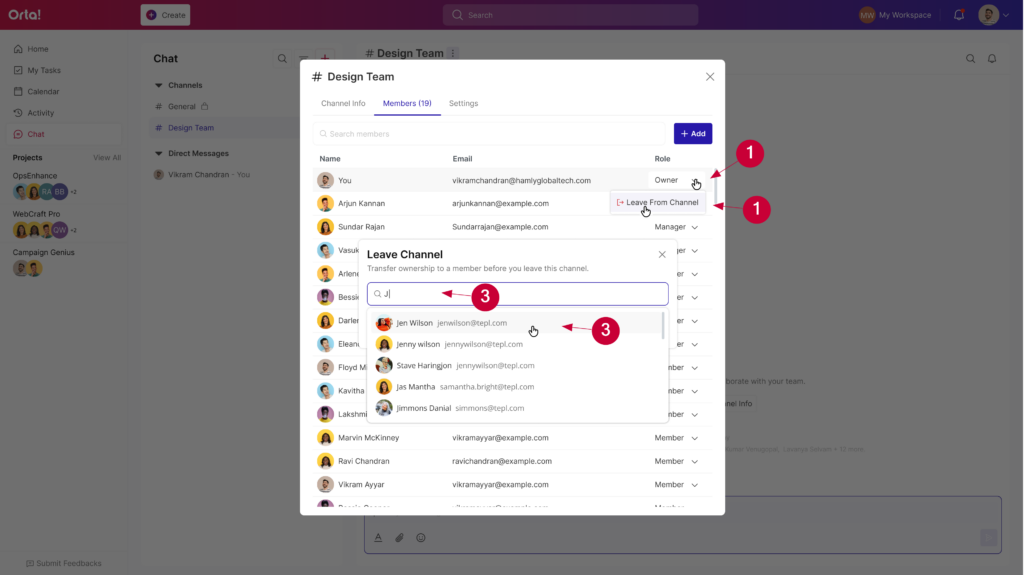
- Start typing a member’s name and select the person who will become the new owner.
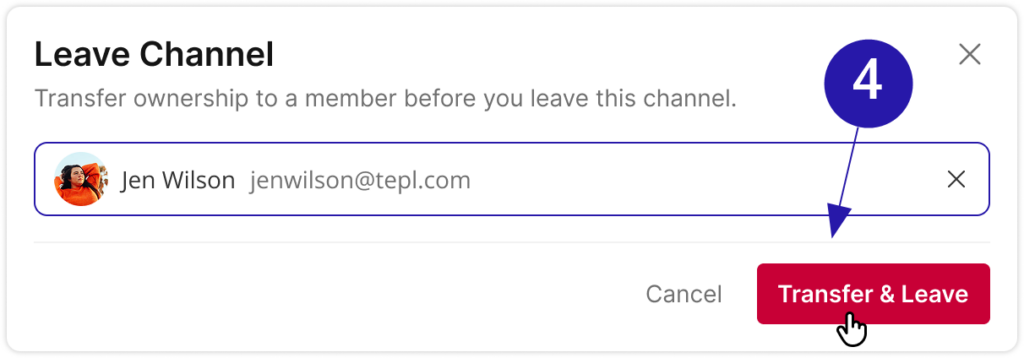
- Once a new owner is selected, click Transfer & Leave button to transfer ownership and leave.
Delete a channel:
When a channel has served its purpose, a channel owner can remove it completely. Deleting a channel removes all messages, files, and access for every member. This action cannot be undone.
Option 1: Via Channel Settings
- Click on the More actions (⋮) button near a channel’s header.
- Select View Channel info from the dropdown.
- Navigate to the Settings tab.
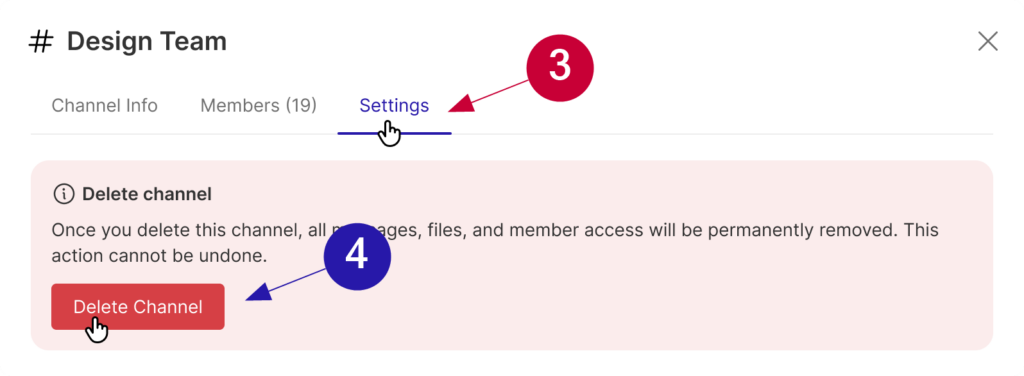
- Click on the Delete Channel button under the tab.
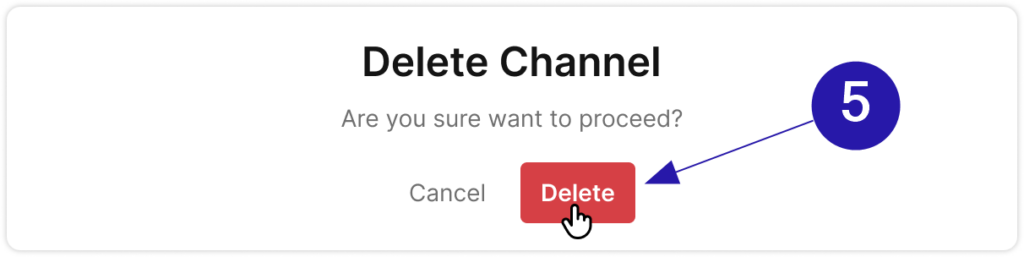
- On the Delete Channel confirmation pop-up, click Delete to permanently remove the channel.
Option 2: Via Header Menu
- Click the More options (⋮) icon in the channel header.
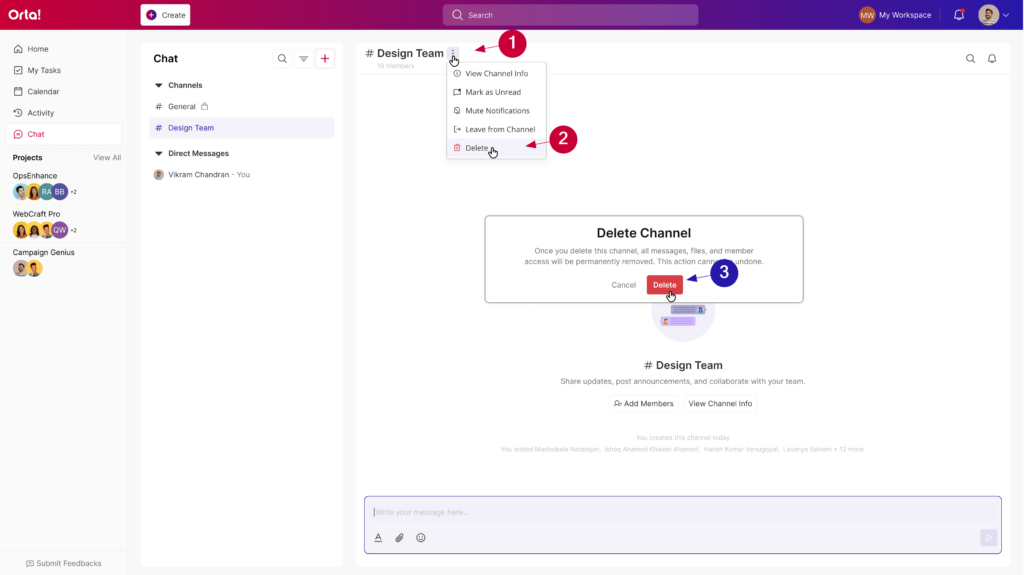
- Select Delete from the list.
- Confirm the action by clicking Delete button in the final prompt.
Managing your channel effectively ensures that conversations stay relevant, members stay aligned, and collaboration remains smooth. By regularly updating channel details and maintaining member access, you keep your workspace clean, organized, and easy for everyone to navigate.