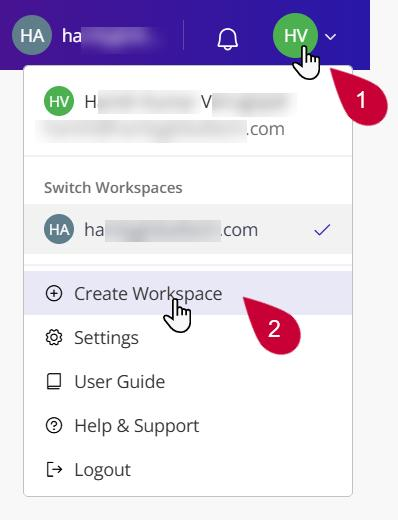
You can easily create a new workspace in Orta from the profile dropdown.
- Click on the Profile icon from the top bar.
- Select Create Workspace option from the list.
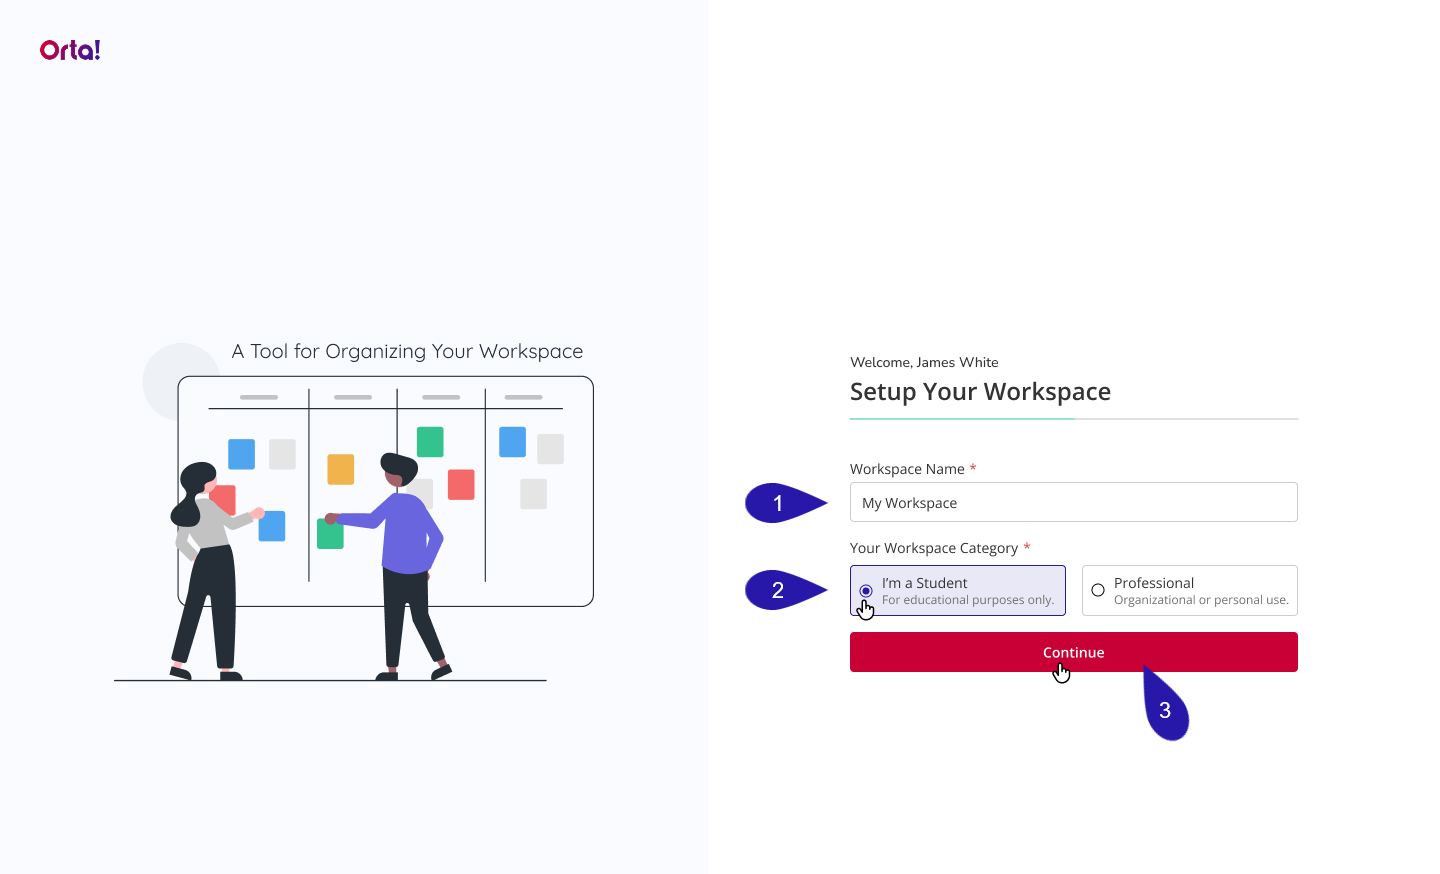
For Student:
1. Enter a Workspace Name:
- Type a name in the Workspace Name text box .
2. Select Workspace Category:
- Choose a workspace category based on your needs(e.g., select I’m a Student).
3. Finalize Creation:
- Click Continue to finish creating your first workspace.
For Professional:
1. Enter a Workspace Name:
- Type a name in the Workspace Name text box .
2. Select Workspace Category:
- Choose a workspace category based on your needs.(e.g., select Professional).
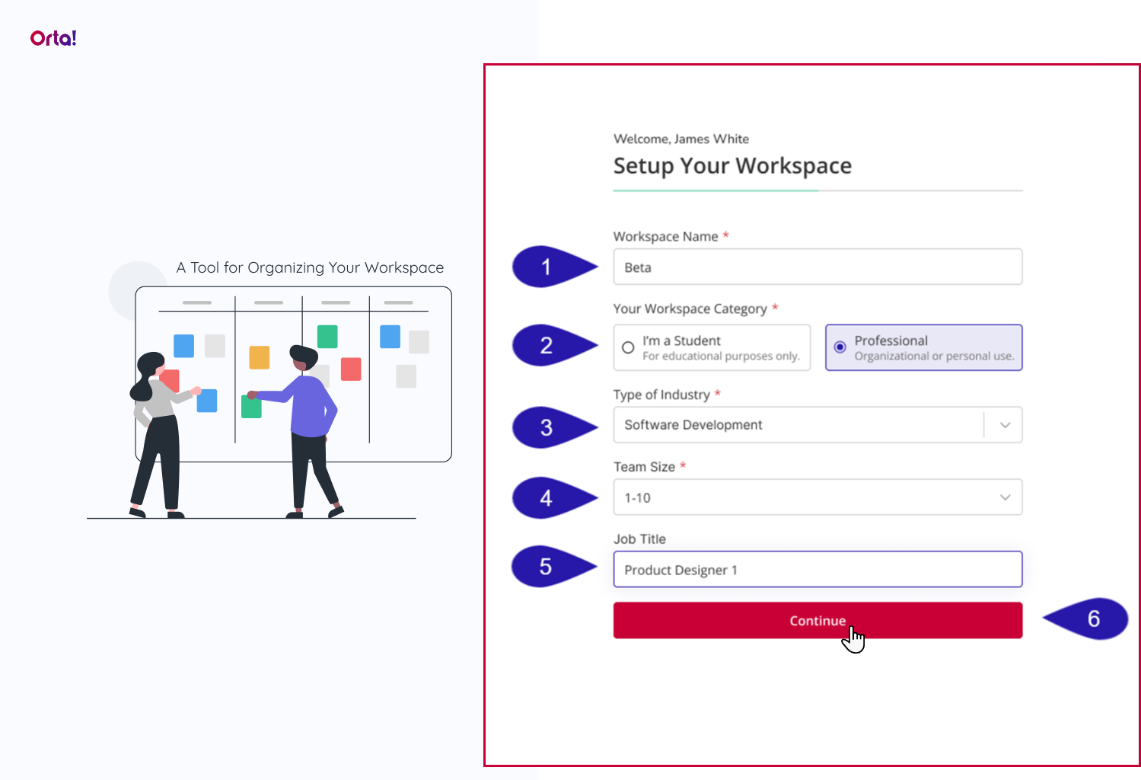
3. Type of Industry:
- Choose an industry from the Type of Industry dropdown.
4. Team Size:
- Choose your Team Size.
5. Job Title:
- Enter your Job Title.
6. Finalize Creation:
- Review your selections and click Continue to finish.
By following these simple steps, you can quickly create a new workspace in Orta tailored to your needs, whether for personal use or professional collaboration.